Friday, June 27, 2014

Baiting Trout

Offering tasty baits, whether manmade or natural, is the way to lure hungry trout released from the hatchery.

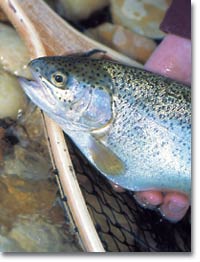
Fly-fishing and trout go together like hotdogs and baseball, yet during the early season, conditions may not be favorable for any form of artificial offering. Granted, it’s a lot of fun watching a wily trout rise beneath a dry fly, and the anticipation of awaiting the strike is almost beyond description. Conversely, it is equally frustrating to watch a trophy trout cruise within range of a perfectly presented nymph then completely ignore your offering.
There’s one thing, however, that’s rarely ignored: bait. Most trout, especially those fresh from the hatchery, rarely forego the opportunity to dine on an easy meal.
SALMON EGGS
Salmon eggs are a highly productive trout bait, especially on opening day. They’re the right size and shape, and in many instances, they are saturated with flavored oils for added enticement. Cheese-flavored eggs seem to be the most popular.
Salmon eggs come in a variety of colors. While red and yellow seem to top the list with fishermen, many anglers have switched to the new fluorescent colors, claiming that they’re more productive during the season’s first few days. And, for some unexplained reason, trout tend to be more attracted to various shades of red over many of the brighter colors.
The popularity of salmon eggs has always been quite high among early-season trout anglers, so high that hook manufacturers went to the trouble to design hooks specifically for use with salmon eggs. They are available in various sizes ranging from No. 8 to No. 14. These hooks have extremely short shanks and come in both turned-up and turned-down eye styles. When properly rigged, the hook can easily be concealed entirely within a single salmon egg. Consequently, the only thing the rainbow, brookie or brown actually sees, even in clear water, is the egg itself.


CHEESE
What do you do when your local tackle shop is sold out of salmon eggs? Make a quick stop at the corner convenience store. Most are open 24 hours a day, and they all sell cheese.
Most soft cheese products make great trout baits, particularly when you’re targeting trout that are fresh from the hatchery. Cheese oils rapidly disperse with the currents, often luring hungry trout from incredible distances. Additionally, soft cheese can readily be formed around a salmon egg hook and molded into pellet-shaped morsels. When all other forms of bait fail, a small glob of cheese may save the day.
MARSHMALLOWS
The first person to use marshmallows for bait was either very creative or totally frustrated. Whatever the case may have been, it worked. Yes, those tiny cocktail marshmallows have saved the day for many trout anglers, especially during the season’s first few days. While marshmallows don’t resemble any form of trout food, hatchery or natural, they do emit sufficient odor to attract various species of fish. In fact, some anglers complain that they are too effective.
Marshmallows can be cut or torn into smaller pieces, then easily formed to cover a salmon egg hook. However, because they have a relatively high air content, marshmallows have the tendency to float. Therefore, a small piece of split shot, preferably BB size must be added to the line about 12 to 18 inches above the hook. This will place the bait close to the bottom. Be sure not to add more weight than necessary to hold bottom, while still allowing the bait to drift naturally. Add too much weight and you’ll spend most of your time trying to dislodge the split shot from snags.
CORN
While fresh corn, yellow or white, doesn’t seem to work well at all, canned, whole-kernel, yellow corn makes a great trout bait. Some believe this is because fine-ground grains are one of the main components in fish pellets, one of which may be corn. The list of ingredients on the side of the fish pellet can does not specify which types of grains are used, but corn seems to top the list of most commercially prepared fish and animal foods. If this is indeed the case, there’s a good argument for the use of corn for trout bait, particularly during the early days of the season.
Again, the bait should completely cover the hook. Depending on the hook’s size, this may require two or possibly three kernels. Fortunately, corn has a slight negative buoyancy, therefore, only one or two split shot may be required to maintain the proper depth. If the stream or river currents are somewhat fast, more weight may be required to maintain the correct depth.
NATURAL BAITS
Worms
While some designated trout streams mandate the use of artificial lures or flies only, many stocked streams permit the use of various forms of natural bait. Obviously, before fishing any body of water, it is a good idea to carefully scrutinize the regulations pertaining to that location. If it is permissible to use live bait, then the selection is almost endless. After feeding on fish pellets for nearly a year, newly stocked trout have two options: switch to natural foods or starve to death. A week or two after stocking, most trout will eat just about anything that comes along, especially if it looks perfectly natural.
Nothing is more appealing to a hungry trout than a fat, pink, juicy garden worm floating with the currents. Even when the weather has been too cold for the worms to occur naturally, trout will instinctively pounce on a properly presented worm. The key to success is proper presentation. As with all forms of bait, the hook should be well hidden. Additionally, if a piece of split-shot is required in order to reach bottom, use just enough weight to maintain the correct depth, while still allowing the bait to drift naturally with the currents.
The worm should be cast upstream at a 45-degree angle, preferably well above the head of the pool. Just as soon as the bait hits the water, close the reel’s bail and begin a slow, deliberate retrieve. Keep sufficient tension on the line to detect the slightest strike and also to gently lift the bait over the snags.
Minnows
A few weeks into the season, trout will actively feed on minnows. While many states do not permit the use of native minnows, tiny fathead minnows are a good substitute, particularly when they measure no longer than 2 inches. The minnows can be either lip-hooked or impaled just beneath the dorsal fin, thereby keeping them alive and active as they drift through deep pools. Some anglers find that attaching a small, clear plastic float aids them in casting the minnow to the most productive locations, such as close to submerged boulders or close to an undercut segment of shoreline.
Crayfish
Small crayfish, those measuring just 1 to 2 inches in length, are great trout baits, especially as the season progresses and water temperatures begin to rise. They can be hooked through the tail and scooted across the bottom, or hooked carefully through the nose and walked over the bottom. Both techniques seem to be equally effective. Keep in mind, however, that crayfish reside and often hide beneath flat rocks; therefore, unless you keep constant tension on the line, they will quickly scurry under any suitable rock.
Hellgrammites
Hellgrammites, the larvae of dobson flies, are likely among the ugliest creatures that nature could have ever dreamed of. They have a prehensile tail, a soft black body with lots of legs and head that resembles that of a gigantic ant. Unlike a butterfly that becomes a beautiful, winged creature after metamorphosis, the dobson fly just grows wings and remains ugly. You can find them residing on the back side of partly submerged, flat rocks in most free-flowing streams. They’re not pretty, but they’re irresistible to any trout.
Hellgrammites have a hard-shell collar that is located directly behind the nasty-looking head and powerful pincers. The collar is a good place not only to hold them, but additionally, it’s a great place to insert your hook. In this particular instance, the hook will be exposed, therefore, a small No. 10, short-shanked, bronze hook will be your best bet. The hook’s color closely resembles that of the hellgrammite. The only problem trout anglers complain about when using hellgrammites is that everything in the stream seems to enjoy eating them.
As the season progresses, other forms of natural baits will become highly productive. Don’t overlook such crickets, grasshoppers, moths and various forms of insect larvae. As each of these becomes available naturally, they also become an integral part of a trout’s diet.
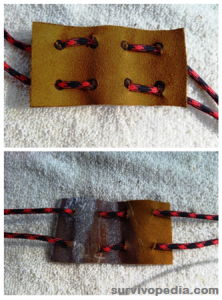
Tuesday, June 24, 2014

Homemade Remedy For Dehydration

Homemade Remedy For Dehydration


Homemade Remedy For Dehydration
Becoming severely dehydrated can rapidly become life threatening.
The most common cause of dehydration is diarrhea, which can be a result of food poisoning, drinking contaminated water, or other sickness or contamination.
Those who have experienced any of these ailments know full well the severity at which your body can be ‘put down’ by an invisible agent.
Especially when in an environment of post-disaster or unsanitary living conditions, you are at risk of being inflicted with diarrhea which can rapidly lead to dehydration.
The key to recovery is to remain hydrated. A homemade re-hydration solution from the following recipe could become a lifesaver for someone who is ill and dehydrated.


Because plain water does not contain sugar, sodium, or potassium (which also is lost from diarrhea) it is important to drink plenty of fluids that contain these substances.
Examples of such drinks include ‘sports drinks’, prepared re-hydration solutions, chicken or beef broth, soft drinks, or bottled and flavored mineral water.
Antibiotics will sometimes resolve the symptoms of diarrhea – however, antibiotics won’t help with viral diarrhea, which is the most common type of infectious diarrhea.
Drugs that slow diarrhea are controversial. Some doctors don’t like their patients to take these medications because it slows the passage of the virus, bacteria, or parasite out of the body. If you wonder whether you should use any of the over-the-counter preparations available for diarrhea, ask your doctor.

A simple alternative to a store-bought re-hydration solution is the following recipe from the World Health Organization:

Homemade Remedy Solution For Dehydration From Diarrhea

Clean water (4.5 cups or 1L)
Salt (1/2 teaspoon or 2.5mL)
Sugar (6 teaspoons or 30mL)
OR…
Clean water (1 cup)
Salt (1/8 teaspoon)
Sugar (1.5 teaspoons)
Oral rehydration solutions should be consumed or discarded within 12 hours if held at room temperature.

Sources include the World Health Organization, WebMD

Five Benefits of Paracord

Five Benefits of Paracord

June 23, 2014, by Ken Jorgustin

benefits of paracord
Paracord is a highly versatile multi-filament nylon cord with nearly unlimited uses, applications and benefits, and is a must have for any survival and emergency preparedness kit.
More details about this amazing cord…


Real paracord is made of seven strong nylon cords with each cord made of several smaller woven strands, all wrapped in a flexible outer braided nylon wrapper. The combined breaking strength of real paracord is 550 pounds. For this reason, some call it “550 cord”.
The cord was first introduced and applied in parachute construction during WWII and was quickly recognized for its use in other tasks. Today it is used by both military and civilians for countless general purpose tasks.
There are many copies in the civilian market today but true military grade cord will be designated MIL-C-5040 Type III and rated for 550 pounds.
Genuine MIL-SPEC MIL-C-5040 Type III Paracord has 7 inner yarns, each made up of 3 strands.
Commercial/Civilian 550 paracord imitations might not have 7 inner yarns or the inner yarns might not have 3 strands each.
“According to the actual Mil-C-5040 government document 550 type III Paracord should be made up of between 7 and 9 strands and each strand shall be 3-ply.”
Having said that, much of the paracord on the civilian market is still VERY good. Just be sure that there are 7 inner yarns (some have 5). It is apparently fairly difficult to find the real Mil-spec paracord with 7-inner yarns AND with each yarn consisting of 3-ply (3-strands) (most are 2-ply, which is still very good for most all purposes).
The cord comes in a variety of colors and lengths (when cut, the ends should be burned or singed to prevent fraying). The inner strands can be easily pulled out for many additional uses.

paracord-7-inner-strands

The 5 Benefits of Paracord

Strength
(In just a 1/8 inch diameter cord, an incredible breaking strength of 550 lbs.)
Durability
(It can be used over and over again while remaining flexible and durable)
Light Weight
(The Mil specification requires that 225 feet of cord weigh 1 pound or less)
Water and Mildew Resistant
(Outside elements are not a problem and it will dry very quickly)
Inner Strands
(The unique ability to remove the inner strands make this cord extremely versatile)

Uses for Paracord

The list is really endless and up to your imagination, but a few ideas include the following.
  • Braiding for even more combined strength
  • Tent and Pole support, building shelters
  • Clothes Line
  • Tow Line
  • Tarp Tie Down
  • Equipment Guy-lines
  • Pack Strap, Fasten, lash and secure gear to backpack
  • Shoe Lace, Boot Lace
  • Garden Lines
  • Shelter Making
  • Fire Bow
  • Lanyard
  • Survival kit
  • Knife Handle Wrap
  • Lifeline, since it will support the weight of a human
  • Inner strands: sewing, fishing, trapping-snares, dental floss, emergency stitches (boil first)

How to Start a Fire After It’s Rained

How to Start a Fire After It’s Rained

It was pretty damp this past Saturday. It rained a few times off and on, and when we finally decided to practice starting a fire in such wet conditions, it was about 85% humidity out. Just in case anyone’s curious about the weather conditions at the time we tried this, the current temperature was 26°C/79°F with little to no wind, so pretty reasonable conditions other than the fact that it had rained multiple times. The fire pit we regularly use wasn’t flooded in any way, but it was certainly drenched wet
fire pit soaking wet
We were determined to start the fire with only the very cheap and simple tools that Thomas EDC’d in his pocket, along with a knife of course. Altogether, we used a waterproof capsule, some lint, firesteel, a bowie, and a pocket knife.
prepping for fire-making
First, of course, Thomas got the lint out of his waterproof capsule.
waterproof-capsule-for-survival
taking out lint for tinderWaterpoof Capsule – Amazon
Once we had the lint, Thomas grabbed one piece out of our large pile of semi-rotted logs, and placed it straight up. He then went to make some dry wood shavings with his knife.
using wet log to build fire
preparing log for fire after rain
In order to determine which branches were dry enough on the inside to use, he flexed a few. The ones that bent he put back since they were too wet. The ones that cracked or snapped, he used for tinder.
dry wood shavings from wet branch
dry wood shavings after rain
carving wood shavingsOntario SP10 Marine Raider Bowie – Amazon
In order to get bigger pieces of dry tinder, he found some thicker branches, and through batoning, managed to cut the tree branches into quarters and then again into even smaller pieces. Once he got to the inside of these branches, he used the dry insides to make large shavings for tinder.
making dry tinder from wet log
batoning log with bowie
bowie used for batoning wood
making a fire after rain
After making enough tinder, he piled it up, placing the lint in the center of the pile, and took out his firesteel to start generating sparks. In order to make sparks with firesteel, you’ll need to use the back of a knife in combination with it. If you’re not sure how, we’ll discuss this in a later post. Although Thomas could have used the bowie again, he decided to use his pocket knife instead, as it’s easier to use a smaller knife to generate sparks.
making a fire when wood is wet
generating sparks with fire starter steel and opinelLight My Fire Swedish Firesteel Mini – Amazon
Opinel No8 Carbon Pocket Knife – Amazon
Once the sparks caught, we realized that the ember had actually been blown into the center of the log and was glowing. Going with it, we began to blow on the center.
ember in core of wet log
After a few minutes of blowing off and on, and adding more tinder to the core, we managed to get a heck of a lot of smoke.
smoke from fire in wet wood
fire making after rain survival
And then finally, a beautiful flame.
made fire in wet wood
surviving with fire after rain
Although it takes a bit of effort, making a fire out of wood that’s been wet due to a recent rainfall is definitely possible. Just remember to be patient and make sure you use only the dry parts of wood for shavings, especially until the fire gets started.

DIY Project: How to Build the Perfect Sling

DIY Project: How to Build the Perfect Sling


sling


In a time of major crisis do not overlook the simple cord sling as a
weapon or a hunting tool. It would fit nicely in your bug out bag
because it is lightweight, easy to store and easy to use. Rocks or other
projectiles to be used as ammo can also be easily picked up wherever
you happen to be.


Even though the sling became less important as guns and other weapons
became more available, slings are still used in Palestine and many
other parts of the world for personal defense and hunting.


How Far Can a Sling Throw a Stone?


With a good arm and a good spin on the sling, the max range is about 100 yards.
Very few people can throw a rock that far and still have the energy to stun a man or an animal.


Types of Projectiles


Basically projectiles are stones, pieces of metal, or anything else
you choose to launch. As long as the projectile fits into the pouch, and
can be spun, it can be released. The heavier the object to be launched,
the shorter is the range.


Making a Modern Sling


SVP_parts for sling


Materials:


  • 2 pieces of paracord or braided rope. You can also use braids of
    leather cord, but make sure you braid together enough leather strips to
    make two pieces of cording.
  • Small piece of leather or thick canvas for the pouch.  A 4“ x 2“
    piece should be more than enough for leather. Make the pouch 1/2“ bigger
    for canvas.
  • Optional Materials: metal rings or grommets designed to protect holes in canvas (not needed if you use leather).
Tools:


  • Leather punch or knife
  • Scissors
  • Small ruler
  • Long stick matches or candle lighter
  • Optional Tools: needle and thread if you are going to use canvas for the pouch.
Find out about self-defense in a survival situation on Bulletproof Home.


Special Skills:


You must know how to tie taut line hitch knot and half knot.


Step 1: Measure leather with ruler and cut into 4“ x
2“ strip. If you are going to use canvas, make the square a little bit
bigger so that you can sew off the borders.sling 2


Do this by folding a small bit of fabric under, iron it, and then
fold again so that the raw fabric is not exposed. Sew through all the
way around the square and through the layers.


Step 2: Punch or cut 4 holes along the top and
bottom of the 4 inch sides. There should be enough boundary around each
hole to prevent the leather or canvas from fraying or tearing.


Step 3: Cut 2 paracord, braided rope or leather braid lengths to about 7‘each.


sling 4


When testing and measuring the sling it must not hit the ground. If it does,you will have to shorten both cords.


Step 4: If you are using paracord, seal off the ends by burning with candle lighter, and then quickly dipping in cold water.


Do not touch the ends for some time, as they will retain heat for a bit and burn your fingers.


Note – paracord will stretch, so do not make these cords too long or you will have to shorten them later on.


Step 5: Thread one cord through each of the four holes in the bottom and top of the 4 inch edge of the leather or canvas.


sling5-6


Starting by coming up threw the first hole, then down threw the
second hole, up threw the third hole, and down threw the fourth hole.


Step 6: Pull each cord so the pouch is at the bottom of the loop and the paracord is equal at the top.


Step 7: Tie a half knot about a foot from the pouch to help stabilize the cords on each side of the sling.


Step 8: If you have too much paracord or leather
left over on each side, cut away the excess, and then re-seal the
paracord with candle lighter.


Step 9: Make a loop to fit your hand and wrist
through one cord. Make a taut line hitch knot and adjust so that the
cord is comfortable around your wrist.


Step 10: On the other cord, tie a half knot at the
point where you will grab that cord when spinning. When holding the
sling, there should not be any slack in either cord. The knot is there
to help you feel which cord needs to be released while operating the
sling.


How to Hold, Load, Spin, and Release a Projectile From the Sling  


Here is my favorite way to hold and use this type sling:


  • Put your hand through the loop cord with the cord falling between the thumb and the first finger on the palm side of your hand.
  • With thumb and the first finger, grasp the knot on the release cord.
    At this point the loop cord should be enclosed in the circle formed by
    the thumb and first finger.
  • Hold the sling with the pouch hanging freely, load and center the rock in the pouch.
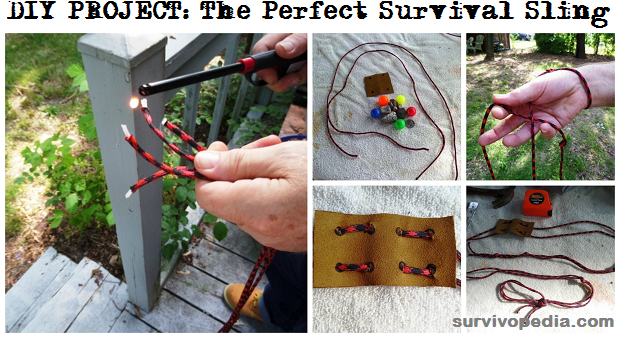
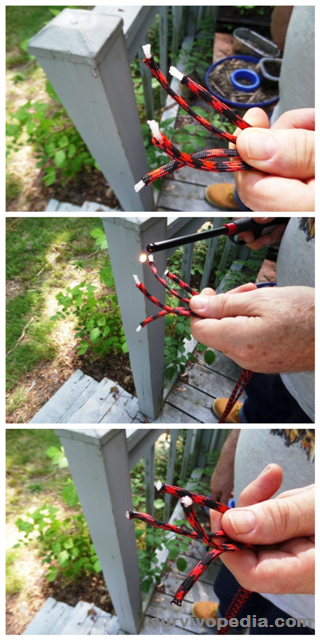
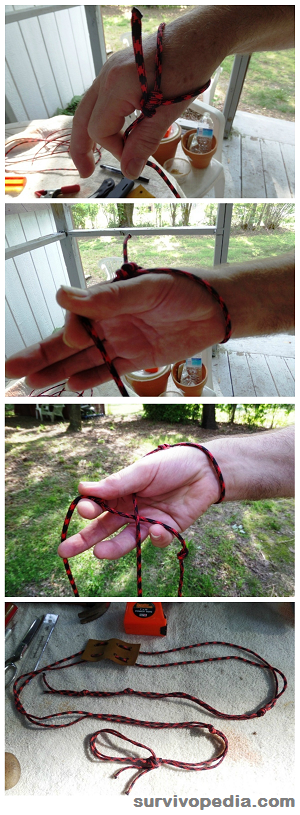
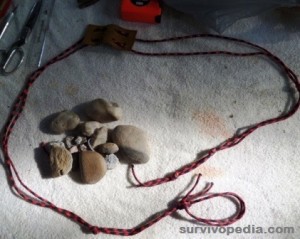
There are two ways to spin the sling:


  • Underhand spin: After loading the sling, swing the sling forward as
    if you are pitching a softball. Swing from the shoulder not the wrist.
    Think of the sling as an extension of your arm. Release the knot cord so
    that the rock will the leave the pouch at about a 45 degree angle from
    the ground. When using the underhand spin it is possible to get a
    running start. This spin is good for power and distance, but lacks
    accuracy. Practice to get the release point.
  • Over the head spin: Start with an underhand and forward spin. As the
    sling is swirling on your power side bring it over your head by bending
    your elbow. The sling will be spinning parallel to the ground. Remember
    that the cords are an extension of your arm. As the sling spins forward
    release the knot cord as if you were throwing a hard baseball. Practice
    to get the release point.
Before using a sling or practicing with it, make sure that:


  • There aren’t any buildings in the impact area that might be damaged if hit by projectiles.
  • There aren’t any people or animals in the the impact area (other than those you are intending to hit).
  • Remember slings are deadly weapons. As simple as they look, slings can kill or inflict great bodily harm if misused.
The double cord sling is a good addition to your bug out equipment
because it is small and easy to carry, ammo is easy to get, and they are
effective for hunting and self defense.


Like any other weapon, practice is mandatory to keep up your skill.
When all of the modern weapons are broken or discarded the simple two
cord sling will still be here to defend your family or to use in
hunting, just as it has for other people for many thousands of years.

Potential New World Record Bighorn

Tuesday, June 3, 2014

Missouri Summers Filled with Black Bears

While the state's black bears largely disappeared in the 1950s, since then they've mounted a steady comeback by, well, mounting each other in the woods and making more black bears. Such is nature.
The Missouri Department of Conservation estimates the present black bear population at 300, with most of the bears concentrated in the southern part of state. With black bears reproducing steadily for the first time in more than half a century, determining the rate of that population growth is the next big goal for the MDC's Black Bear Project.
"We want to know how fast that population is growing," says MDC resource scientist Jeff Beringer. "What's the population going to be like in ten years? Are we going to have five times more bears? Are we going to have the same number of bears? We really don't know."
See also: Boo Boo the Bear is Saved, Finds Temporary Home at Saint Louis Zoo after Rabies Scare
Beringer and his Black Bear Project team have been following the black bear population for the past four years, but to determine the rate of growth they first need to track a statistically significant number of reproducing bears.
To that end, Beringer and his team will crisscross the state over the next seven years in order to find, trap and radio-tag bears. He says June is the main time of the year for bear mating, and he's planning to tag and track female bears all the way to their winter dens to see how many cubs they've had.

blackbear555.JPG
MDC
Jeff Beringer extracts a tooth from a tranquilized black bear.
But with the animals' increased population comes the inevitable collision with humans. As Beringer puts it: "You have civilization to deal with." "There's going to be a point where you reach social carrying capacity for the number of bears on the landscape and they start to cause a lot of conflict with the people," he says. "When that happens people start to get a negative attitude about bears."
To avoid those conflicts, both the MDC and the Missouri Black Bear Foundation, a non profit, are working to educate Missourians on safe interaction with bears and efforts to conserve the animals' habitats.
"I think there is a lot of potential fear," says Jim Karpowicz, outreach coordinator for the Missouri Black Bear Foundation. "The people of Missouri need to get their head wrapped around that and take some steps as far as how they handle their garbage and how they handle food in campgrounds."

blackbear3333.JPG
Missouri Department of Conservation
Karpowicz suggests campers or people living in heavily bear populated areas take great care when it comes to food.
"Bears will get up on people's porches for dog food and they've been known to go after bird feeders," he says. "People should just being aware that there are these huge vacuum cleaners with incredible noses that are out there, and you can't make life easy for them."
Beringer is even more blunt when it comes to people feeding bears.
"A fed bear is a dead bear," he says. "Put the food in the trunk of your car or put it in a place where a bear won't have access to it, that's going to keep the bears wild and that's going to keep the bears from causing you a problem."
However, as the bear population grows these clashes with humans may be unavoidable. States including Wisconsin, Minnesota, Colorado, California and Florida are already dealing with bears rambling near -- or into -- human areas.
Eventually, Beringer predicts that Missouri will manage its bear problems the same way it manages its other animal problems.
"We'll hunt bears at some point," he says. "There's no question."
Until then, if you see a bear DO NOT SHOOT IT. Instead, fill out this form to help Beringer in his quest to track and preserve Missouri's fledgling bear population.